Oil-Free Air Compressor Won’t Start: Troubleshooting Checklist
by ep | Jun 10, 2026 | Knowledge
Troubleshooting Checklist
An oil-free air compressor that won’t start is a production stoppage — and in most cases, the root cause is one of a short, predictable list of electrical, mechanical, or control faults that can be systematically isolated in under 30 minutes without specialist tools. This checklist walks through every cause from most to least common, with the specific check and action at each step.
✦ Electrical & Control Checks
✦ Safety Interlock Diagnosis
✦ Mechanical Fault Identification
Before You Diagnose: Define the No-Start Symptom
There are three distinct “won’t start” presentations, each with a different diagnostic path:
Type A — Completely Dead
No lights, no display, no response to the start button. The control panel is not powered. Cause: no mains supply, blown fuse, tripped circuit breaker, or main switch not closed.
Type B — Control Panel Powered, Fault Displayed
Display lights and a fault or alarm code is shown. The controller has detected a condition that prevents starting. Read the fault code — it is your most specific diagnostic tool.
Type C — Starts Then Trips Immediately
The motor attempts to start, runs for 0–3 seconds, then trips. Cause: motor overload, locked rotor, phase failure, or a protection device responding to a condition that appears immediately at start.
Safety First — Lockout/Tagout Before Any Physical Inspection
Before inspecting any mechanical component inside the compressor enclosure, isolate and lock out the electrical supply at the disconnect switch. Compressed air systems store significant pneumatic energy in the receiver and pipework — also release system pressure before opening any component connected to the pressurised system.
The Complete Won’t-Start Checklist
1
Check mains power supply to the compressor
Verify that the mains circuit breaker feeding the compressor is in the ON position. Check the isolating switch at the compressor itself. On three-phase compressors, verify all three phases are present using a phase indicator or voltmeter — loss of a single phase prevents motor starting but may not trip the upstream circuit breaker.
Action if fault found: Reset tripped circuit breaker. If it trips again immediately, there is a downstream fault — do not continue resetting. Investigate the fault before resetting again. Restore missing phase by investigating the supply fault (blown fuse in distribution board, failed contactor upstream).
2
Read the controller fault code
If the control panel has power and is displaying a fault or alarm code, this is the most valuable diagnostic information available. Record the exact code and look it up in the service manual. Modern oil-free screw compressor controllers display fault codes that directly identify the failing protection system — overtemperature, high pressure, low water level, motor overload, phase fault, emergency stop active, etc.
Common fault codes and their meaning:
| Fault Code Category |
Likely Root Cause |
First Action |
| Overtemperature / High Temp |
Compressor shut down due to high temperature — needs to cool before restart. May indicate ventilation or cooling fault. |
Allow 20 min cooling. Check room temp and filter. See overheating guide. |
| Motor Overload / OL Trip |
Motor thermal overload relay has tripped due to overcurrent. May be due to mechanical overload, voltage problem, or genuine motor overheating. |
Allow motor to cool 10–15 min. Check motor overload relay — reset and retest. Investigate cause if trips again. |
| Emergency Stop Active |
E-stop button has been pushed and not released, or a remote E-stop in the circuit is open. |
Check all E-stop buttons in the circuit — pull to release (twist-to-release type) or check remote E-stop wiring. |
| Phase Fault / Phase Loss |
One or more phases missing from supply. Phase monitoring relay has detected imbalance or loss. |
Measure all three phase voltages at the compressor terminals. Investigate supply upstream. |
| Low Water Level (water-lube) |
Water level in reservoir below minimum — compressor protects element from dry-running. |
Top up water to correct level using approved water (deionised or as specified). Check for leaks. |
| High Pressure / Over Pressure |
System pressure above the maximum set pressure at time of start attempt. Pressure switch or transducer fault, or true overpressure. |
Check actual system pressure. If at or below cutout setpoint, suspect pressure transducer fault. |
3
Check the motor overload relay
The motor overload relay (thermal overload) is a bimetallic protection device that trips when motor current exceeds its setpoint for a sustained period. It is distinct from the circuit breaker — it trips at a lower current than the circuit breaker and requires a manual reset. Locate the overload relay in the starter panel — it is typically a small block mounted on the contactor with a coloured reset button (often yellow). If the relay has tripped, the reset button will be visibly protruded or an indicator flag will be visible.
Action: Allow the motor to cool for 10–15 minutes (the bimetallic element must cool before resetting). Press the reset button firmly. Attempt a restart. If the relay trips again within the first few minutes of running, there is an overcurrent cause that must be investigated — check motor current against nameplate FLC, verify three-phase supply balance, check for mechanical overload (locked rotor, jammed element).
4
Verify emergency stop circuit (E-stop)
Emergency stop buttons are wired in series in the safety circuit — any single E-stop button that remains depressed (or any break in the E-stop circuit) prevents the compressor from starting. Check every E-stop button in the compressor circuit: the panel-mounted E-stop, any remote E-stop at the compressor room entry, and any E-stop in a remote control panel if fitted. Twist-release E-stops must be rotated clockwise to release the latching mechanism — they do not spring back when released. Key-operated E-stops require the key to release.
Action: Walk the complete E-stop circuit. Confirm each button is released (not depressed/latched). If the circuit includes a remote panel or communication interface, verify the remote stop command is not active. After confirming all E-stops are released, attempt restart.
5
Check VSD drive (variable speed drive compressors)
On variable speed drive compressors, the VSD drive is an additional component that must be powered and fault-free before the motor can start. The VSD has its own fault log separate from the compressor controller. Access the VSD display panel (typically inside the main electrical enclosure) and check for displayed fault codes. VSD fault codes use the drive manufacturer’s own numbering system — refer to the drive manual (Siemens, ABB, Danfoss, Schneider, etc.) for code interpretation.
Common VSD faults on no-start:
→ DC bus overvoltage (mains supply spike event) — usually clears on power cycle
→ Ground fault detected — requires electrical inspection of motor and cable insulation
→ Drive overtemperature — check VSD cabinet cooling fan and filter mat
→ Communication fault (between controller and VSD) — check communications cable and termination
→ Parameter error after power loss — check if drive parameters were retained (battery-backed memory)
6
Check pressure switch / pressure setpoints
The compressor will not start if system pressure is already above the cut-in setpoint of the pressure switch or above the start setpoint in the controller. This is normal behaviour — but if the system pressure is erroneously reading high due to a faulty pressure transducer or a mechanically failed pressure switch, the compressor will not start even with low actual system pressure. Compare the controller’s displayed system pressure to a calibrated reference gauge at the receiver.
Action: If controller shows high pressure but reference gauge confirms actual pressure is below cut-in setpoint — suspect a faulty pressure transducer or switch. Replace the faulty component. If actual system pressure is genuinely high (receiver still pressurised from previous run), open a bleed valve to reduce pressure below cut-in setpoint and retest.
7
Check for mechanical seizure / locked rotor
If the motor attempts to start (hum from the motor is audible) but does not rotate, or trips the overload relay within 1–2 seconds of start attempt, a mechanical seizure (locked rotor) condition may be present. On direct-drive compressors, this means the compression element is mechanically seized. On belt-drive compressors, it may be the compressor element, the motor bearings, or a jammed tensioner.
Test for locked rotor (electrical isolation first — LOTO): Attempt to rotate the compressor element manually by turning the belt sheave or coupling by hand. The element should rotate with moderate resistance (compression resistance) but without binding or grinding. If it will not rotate — or if rotation produces metallic grinding — the element is seized and requires specialist internal inspection.
Do not continue attempting electrical starts if mechanical seizure is suspected — repeated locked-rotor starts burn out the motor windings rapidly. Contact an authorised service technician.
8
Water-lubricated compressors: check water level and water system
Water-lubricated oil-free screw compressors have a water level protection system that prevents start-up if the water reservoir level is below the minimum safe level. This protection prevents the compression element from running without lubrication, which would cause immediate rotor damage. The low water level fault is typically displayed as a fault code on the controller and the water level sight glass or sensor can be visually inspected.
Action: Check the water level in the reservoir sight glass. If low, top up with the specified water type (typically deionised or demineralised water — check the manual; tap water causes scale build-up). Investigate the cause of water loss: a small water leak in the circuit will cause recurring low-water faults. If water level is correct but the fault persists, suspect a faulty water level sensor.
9
Check motor capacitors (single-phase motors only)
Single-phase oil-free compressors (typically smaller scroll and piston units used in workshop or laboratory applications) use a start capacitor and/or run capacitor to create the phase shift needed for motor starting. A failed capacitor causes the motor to hum at start but not rotate — or to rotate at reduced speed and trip the overload relay. Capacitors fail silently and are a common no-start cause on aged single-phase compressors.
Action: After electrical isolation and safe discharge time (capacitors hold charge — allow 5 minutes after isolation), visually inspect capacitors for bulging, cracking, or leaking electrolyte. A capacitor tester or LCR meter can verify capacitance is within 10% of rated value. Replace any failed capacitor with an exact-rated replacement (µF rating and voltage rating must match).
10
Check starter contactor and control circuit components
The main contactor — the power switch that connects the motor to the supply — can fail mechanically (contacts welded closed or open) or electrically (coil failed, preventing the contactor from closing). A failed contactor coil produces no audible click when the start command is given; a failed contactor with welded-open contacts allows no power to reach the motor. The control circuit fuse — a small fuse protecting the 24V or 240V control circuit — blows silently and leaves the control system unpowered even if the main supply is present.
Action: Check control circuit fuse with a continuity tester (fuse should be continuous). Listen for the contactor click when the start button is pressed — absence of a click with control power present indicates a contactor coil fault, control interlock fault, or PLC/controller output fault. A failed contactor should be replaced with an exact-rated equivalent — do not operate a compressor with a temporarily bridged or bypassed contactor.
Quick Reference: Won’t-Start Checklist Summary
| Check |
Time Required |
Tools Needed |
DIY? |
| Mains power and circuit breakers |
2 min |
Visual / voltmeter |
✅ |
| Controller fault code |
2 min |
Display panel + manual |
✅ |
| Motor overload relay |
5 min |
Visual inspection |
✅ |
| E-stop circuit |
3 min |
Visual inspection |
✅ |
| VSD drive fault log |
5 min |
VSD display + manual |
✅ |
| Pressure switch / transducer |
5 min |
Calibrated reference gauge |
✅ |
| Mechanical seizure check |
10 min |
LOTO + manual rotation |
⚠️ LOTO required |
| Water level (water-lube units) |
2 min |
Sight glass visual |
✅ |
| Capacitors (single-phase units) |
10 min |
Capacitor tester / LCR meter |
⚠️ LOTO + discharge |
| Contactor and control fuse |
10 min |
Continuity tester / multimeter |
⚠️ Electrical knowledge required |
After-Hours and Remote Support
Australia Oil Free Air Compressor Co., Ltd. provides remote diagnostic support for won’t-start faults on compressors in our supply network. Before calling a service technician, complete the checklist in this article and have the following information ready: compressor model and serial number, the exact fault code displayed on the controller, which steps in this checklist have been completed and their outcomes, and any recent events (power outage, maintenance work, operational change) that preceded the fault.
With this information, our team can identify the most likely root cause and guide you to the correct resolution remotely in most cases — often avoiding the cost and delay of an urgent service callout.
Contact us at [email protected] for remote diagnostic support.
Recommended Product
CM45D — Water-Lubricated Oil-Free Screw Compressor: Simplified Controls, Fewer No-Start Faults
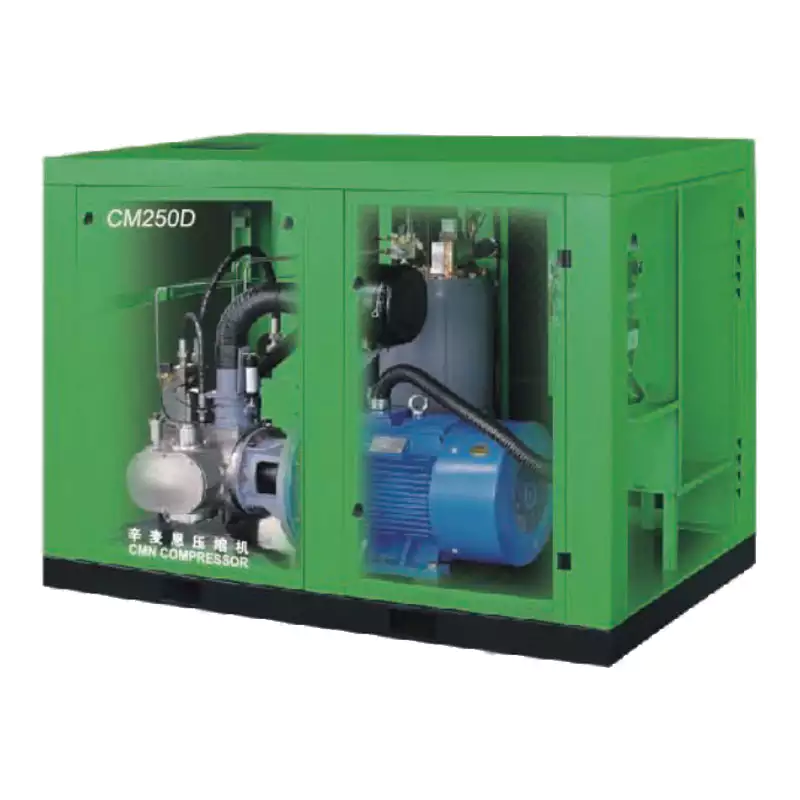
The CM45D water-lubricated oil-free screw compressor uses a modern integrated controller that displays clear fault codes for all protection states — eliminating the guesswork in fault diagnosis. The water-lubricated design eliminates dry-run risk (the most common cause of catastrophic no-start due to seized element in oil-free designs), and the integrated VSD with direct pressure control removes the separate pressure switch as a no-start failure point. Our CM45D controllers log all fault events with timestamps, providing maintenance teams with a clear history of any fault occurrence for root cause analysis. Remote monitoring capability is available as a standard option — enabling our service team to view controller data directly for remote diagnostics without requiring an on-site visit.
View CM45D Specifications
Frequently Asked Questions
My compressor displays a fault code but the manual doesn’t explain it clearly — what should I do?+
Photograph the controller display showing the fault code and the conditions at the time (pressure reading, temperature reading). Contact the compressor manufacturer’s technical support line or your supplier with the compressor model, serial number, and the fault code photograph. Most manufacturers maintain technical hotlines for fault code interpretation. Do not attempt to bypass or ignore fault codes — the controller is reporting a measured condition that prevents safe operation, and bypassing protection puts the equipment at risk of damage.
The compressor tripped during a power outage and won’t restart — is this normal?+
Most compressors have auto-restart disabled by default after a power interruption — requiring a manual restart to prevent unexpected automatic restart after power restoration (which is a safety requirement). This means after any power outage or supply interruption, the operator must press the start button again to restart the compressor. Check the controller display for a “power fail” or “supply interruption” fault — this is informational only and clears with a manual start command. If the controller has an “auto-restart after power failure” feature enabled and the compressor still won’t restart after power restoration, the fault is elsewhere in the start circuit.
Can I bypass the motor overload relay temporarily to keep production running?+
No. Bypassing the motor overload relay removes the primary protection against motor winding damage from overcurrent. The overload relay tripped for a reason — overloaded motor, phase loss, or mechanical seizure — and bypassing it without identifying and correcting the root cause will either burn out the motor windings within minutes or seconds, or cause further mechanical damage if the element is seized. The cost of a replacement motor is far higher than the cost of a production delay while the fault is correctly diagnosed. If production continuity is critical, the correct approach is to investigate and rectify the fault, or to switch to a backup compressor if one is available.
Why won’t my compressor start in cold weather (below 5°C)?+
Many oil-free compressors have a low-temperature protection — a thermostat or temperature sensor that prevents start-up below a minimum ambient temperature (typically 2–5°C). This protection exists to prevent start-up when condensation in the system may have frozen, which could cause mechanical damage during attempted rotation. For water-lubricated compressors, sub-zero temperatures risk water freezing in the rotor chamber. Check the controller for a low-ambient-temperature fault code. Solutions: install a compressor room heater to maintain minimum temperature; use the controller’s pre-heat function if fitted; or insulate and heat the water circuit on water-lubricated units installed in outdoor or unheated locations.
The compressor is on a BMS or automated control system — could that be preventing it from starting?+
Yes — if the compressor is controlled by a building management system (BMS), SCADA, PLC, or remote automation system, a remote stop command or interlock condition from that system can prevent starting even when all local conditions are satisfied. Check the BMS/SCADA for remote stop commands, interlock states, or communication faults. If the compressor has a local/remote selector switch, switch to LOCAL and attempt a manual start from the compressor panel — if it starts in local mode but not under BMS control, the fault is in the BMS logic or the remote control circuit rather than the compressor itself.